Posted on Leave a comment

Irvine French Baking Class #2: Apple Pie & Tarte Tatin

After attending the fun lemon tart class I attended last year, I signed up for the “Apple Pie and Tatin Tart” class when it opened a few months back. Despite registering early for the Irvine baking class, I almost decided to withdraw the night before. After months of hectic schedule, I didn’t think I could show up on a Wednesday night to bake from 7PM to 9:30 PM. Just the thought of it exhausted me.

However, I simply could not miss out on another opportunity to learn French baking from a French instructor. And I’m so glad that I didn’t! ๐Ÿ˜‰

Snapshot of the baking classes offered by the city of Irvine.
The OC French baking class hosted by the city of Irvine is really popular so spaces fill up quickly.
Early registration is recommended!

Before the Baking

Just like last time, the class was taught by instructor Sylvie Roux at the Irvine Fine Arts Center. The center has a studio with an oven and kitchen, and participants simply have to show up on the designated day and time wearing closed-toe shoes and a $10 ingredients and tolls fee.

The studio where the class was held. The kitchen with a fridge (shown above) & oven (not shown) and all the ingredients prepared on the front table.

*The ingredients fee is separate from the class fee, which was $47 (around $50 with convenience fee). We were told to pay the ingredients fee in cash, in check or via Venmo only (no credit card).

We were also told via email that we could bring small or medium containers to bring home our pastries. (From my experience, it’s best to bring a large/wide container that can hold pie-shaped pastries. Both the lemon tart and apple pie + tatin tart were baked in round shapes.)
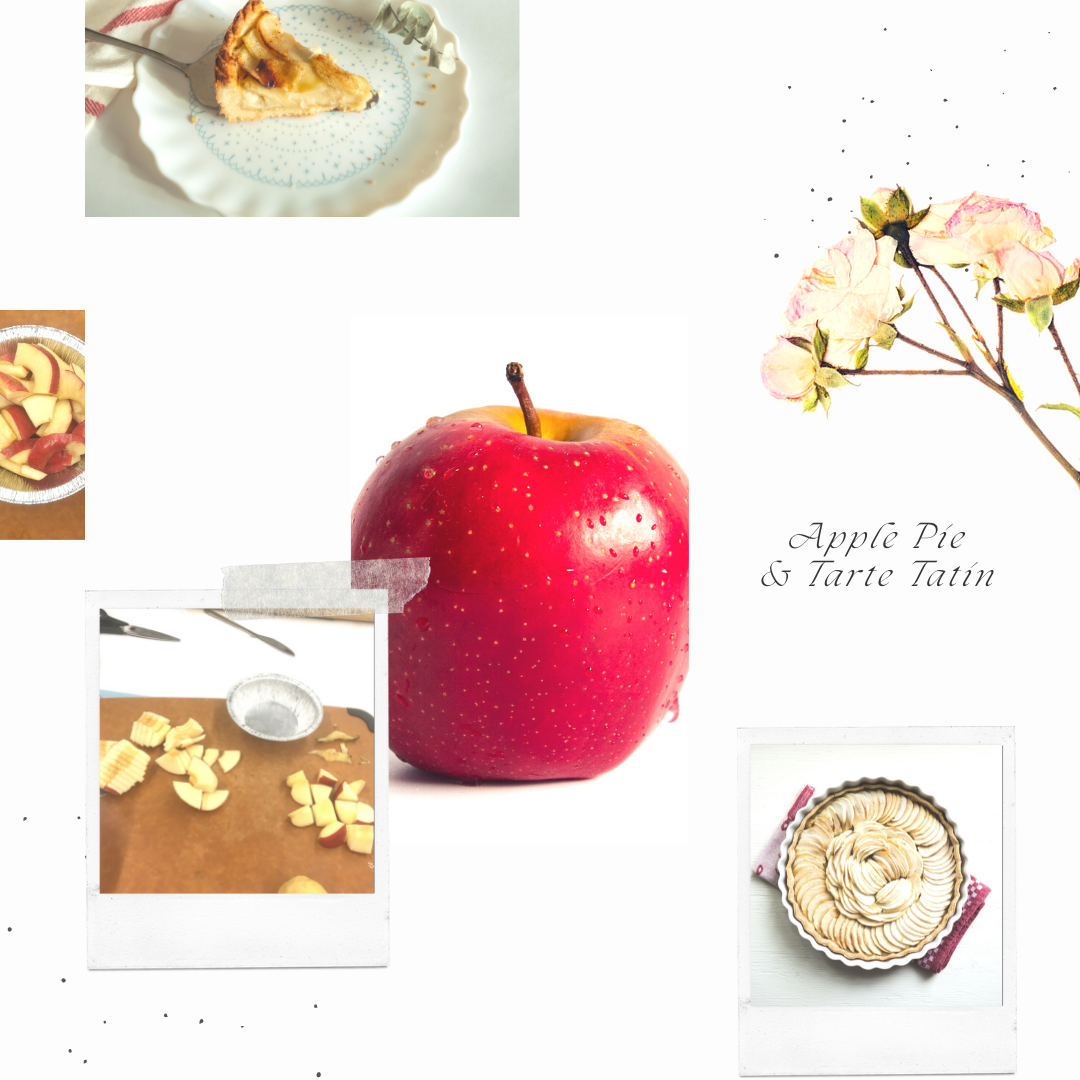
Apple Pie

Baking supplies & recipes placed in front of each seat around the main table.

Led by our instructor and her assistant, us twelve participants sat around a large table and worked in groups of 3~5 to create both the apple pie and tarte tatin. We started off with the pie and tart dough, mixing the ingredients together in a food processor. Since we worked in groups, sometimes watching was all you could do while others did the work. But I think watching others bake helps you learn as well.

After creating the batter, we each got a small batch to place inside our given pie molds. While we preheated the pie dough in the oven, we moved on to the highlight of the apple pie/tatin tart: ๐ŸŽ

Apples Galore

Photo by Shelley Pauls.

Each of us were given a single Gala apple to peel with an apple peeling machine. It was my first time using an apple peeler/corer/slicer, and I must say it does wonders!

Since there was only one apple peeling machine, us participants each took turn peeling our Gala apples. Then, we further cut the beautifully peeled apples into smaller bits and pieces to place on top of the preheated dough.

As for the finishing touch, we sprinkled whipping cream + egg + sugar preparation on top before completely baking our pies in the oven.

Waiting for the apple pie to bake…
Apple pie ready to go! ๐ŸŽ๐Ÿฅง

Tarte Tatin

As inexperienced as I am in French baking, I thought that “apple tatin tart” and “apple pie” were similar, i.e. interchangeable. So I thought we were making apple tart for this class. But I learned that tarte tatin is completely different and we were making BOTH the apple pie and apple tatin tart.

First of all, tatin tart has caramel in it. Our instructor taught us how to make caramels, and to our surprise, caramels are nothing but heated sugar!

Secondly, to make a tarte tatin, you pour the caramel on the bottom of the mold, put in the sliced apples, cover it with the dough, and then flip over the tart once baked. With apple pies, you put the dough then the apples, but with tarte tatin, you put the caramel and the apples then the dough.

Pouring the caramel first inside the mold.

Tarte tatin being baked.

The final step: flipping over the baked apple tarte tatin! Our instructor advised us to be extra careful in this step as the caramel was very hot. ๐Ÿ”ฅ

Takeaways

My second French baking class taught by instructor Sylvie Roux was as informative and fun as my first one. She handed us her recipes for both the French apple pie and apple tatin tarte, which are authentic French recipes from her family with her own tips. And after class, we each left with one small apple pie and one small apple tatin tart.

Apple pie (left) and apple tarte tatin (right). Both tasted really good!

The OC French baking classes offered by the city of Irvine are great ways to explore French pastries as well as opportunities to work in a collaborative environment with fellow beginner bakers. They’re wonderful in that you get to learn French baking from a French instructor without overly expensive fees/tuition or the need to travel to France.

If you dream of baking but don’t know where to start, I recommend OC French cooking classes!

๐ŸŽLink to OC French Baking Class Instagram page: https://www.instagram.com/frenchcookingoc/

๐ŸŽLink to Irvine classes taught by instructor Sylvie Roux: https://secure.yourirvine.org/CA/city-of-irvine/catalog

๐Ÿ‹To read about the lemon tart class I took last year, click HERE.

P.S. I tried to recreate the French apple pie by myself over the weekend, and it turned out pretty successful!

As even I, a complete beginner, can now bake French apple pie and lemon tart by myself, the classes are totally effective! ๐Ÿ‘


Posted on Leave a comment

Irvine French Baking Class #1: Lemon Tart

On a crisp October morning, I went to attend a French baking class in Irvine that I had signed up for a few weeks back. To tell the truth, my very first dream was becoming a patisserie. Of course, back when I was little, I had no idea that such a word existed. So I told everyone – my family, relatives, and friends – that I wanted to own a bakery to decorate cakes. I thought it was the same thing as a “patisserie.” But I didn’t become a “bakery owner,” and my dreams shifted around multiple times.

But today, I finally got to revisit my very first dream and bake a lemon tart at the Irvine French baking class! ๐Ÿ‹๐Ÿฅง

Photo by an_vision.

Making a Lemon Tart – The Beginning

The materials all being provided for (with a fee of $10), my fellow classmates and I simply had to follow instructions given by our French instructor, Sylvie Roux. She was efficient and friendly, giving us professional tips and knowledge on the details of making a good lemon tart.

Materials provided.

Everyone received a ceramic pie holder/mold to create their lemon tarts on, and each holder was named with a French word. Mine was “Montmartre,” the famous hill in Paris. Others got “Paris,” “France,” “Merci,” “Bisou,” and other beautiful French words.

Lemon Zest

So the first thing we had to do was create lemon zest. The 11-12 of us got into groups of two to create the lemon zest under the guidance of 3 French instructors. Some people were given zesters and others graters.

I was the only person to receive a knife to cut the lemon peels as supplies were low. If I had been better acquainted with knives, I wouldn’t have had a problem. But as I was only a baker by heart, not by hands or actual skills, I cut myself. (It was so embarrassing!) The cut wasn’t deep so I tried to hide it away, but my caring class mates and teachers got me a band aid.

It had only been 10 minutes into the cooking class and I already hurt myself! ๐Ÿ˜–

Lemons used for creating the lemon zest and juice! ๐Ÿ‹ ๐Ÿ‹ ๐Ÿ‹

I thought that I was the only person to cut the lemon with a knife (and cut oneself with it), but others were also given knives later on to cut the lemons. Luckily, no other baker was injured, and we successfully made 200g of lemon juice and piles of lemon zest.

Zests ready to go.

The Sugar Dough

After producing the lemon juice and zests, our next step was to create the sugar dough. In large groups of about 5 to 6 people, we took turns mixing butter, powder sugar, lemon zest, almond powder, egg, yolk, vanilla extract, and flour.

Mixing the ingredients altogether.

After about 40 minutes, we got a gritty dough to work with.

My little batch of dough.

Each of us had our little batch of gritty dough (sugar + butter). As instructed, we covered them up with plastic wrap, left them in the fridge for 30 minutes to get:

Voila!

The Lemon Cream

The lemon cream was created before the sugar dough. Our French instructors were very efficient with time, so we worked on the lemon cream while waiting for the sugar doughs in the fridge. Similar to how we produced the dough, groups of 5-6 took turns heating the lemon juice and mixed it with sugar, zest, 6 eggs, agar agar, and cold butter.

Mixing ’em up.

It’s Baking Time

After creating the lemon cream, we took out our doughs, rolled them on the sheets and put them in our molds.

While our doughs baked in the oven at 370ยฐF for 15 minutes, our French instructor introduced us to making meringues. It was surprisingly easy: you mix egg whites and sugar together at high speed:

The Finishing Touch

Once the doughs were taken out (and cut out of the molds by our instructors), we all poured lemon cream into what had become crusts. And with the meringue our instructor created, we each took turns decorating our lemon tarts.

Mine looked as follows:

Lemon Tart & Dreams

The lemon tart was dรฉlicieuse! The sweet and sour complemented each other so well. But I think I can definitely do better next time, especially with the decoration..

The French baking class led by Slyvie Roux was such a treat – a fun experience where I got to reconnect with my younger self who wanted to create pastries and “own a bakery.”

Though I most likely won’t become a patisserie at this point, I can and will bake more pastries. And hopefully create better-looking lemon tarts. ๐Ÿ˜‰

Photo by an_vision.

To learn more about the Irvine French baking class, check out these links:


P.S. I attended the Irvine French baking class again to learn how to bake apple pie and tarte tatin. Check out the post HERE.

*Update: A couple of weeks after the class, I tried to bake the lemon tart by myself at home, and it turned out great!

My lemon tart (feat. strawberries & blackberries instead of meringue)

And it was dรฉlicieuse! ๐Ÿ˜